Tuesday 31 December 2013

Custom steering boss

For the IVA test in June I did not fit the aero screen as the general advice was not to provoke the testing sharp edges rules. I therefore fitted a cheap steering wheel with lots of padding that would give me a good view of the instruments and satisfy the IVA man.

After the IVA test I immediately fitted the aero screen, wanting to take it touring in Scotland and not having to wear a helmet all the time. That is when the trouble started. The 300mm steering wheel now fouled the aero screen. To save having the car off the road in prime blatting season I elected to fit a small 250mm D shaped sports wheel. The clearance and driving position was now fine but the very positive steering and view of the instruments was poor. At that time I decided to put the problem off for another day.

Aero screen with sports wheel

Over the Christmas 2013 break I decided not to put it off any longer. I ordered up a 120mm diameter round billet bar 2" deep from the local metal merchants. This is pretty well the limit of what I can easily turn in my small lathe. To make it easier to mount in the chuck, first off I put a 2" hole down the centre using a Rota-broach hole cutter. (*) see note

The final boss had 18 radial holes:
* 6 to mount the steering wheel flange
* 6 recessed holes to mate with the existing collapsible boss
* 6 to mount the cover plate
However you need a rotary table or indexer to accurately position these holes or an incredible amount of luck.

The resulting wheel is much improved classic style suiting the car and owner.


See clearance S/W to plexiglass

Dashboard side

Profile with additional 20mm clearance
Contents

http://sylvabuild.blogspot.co.uk/2012/01/sylva-j15-is-kit-car-designed-by-jeremy.html

Note(*):For those who have not discovered Rota-broaches you don't know what you are missing. They are precision hole saw (you do need a vertical drill to use them however).

Thursday 19 December 2013

Tonneau design

This page is intended to illustrate the wonderful work that Karen did who made my Tonneau. The original pattern was made of Toolstation groundsheet and marked up with paint stick then cut out with sissors. This is not Karen's main job but I think you will agree she has made a fine job. The first test will be on the road to Applecross soon with the Westfield Club (WSCC).

View from front

Rear off side


Contents

http://sylvabuild.blogspot.co.uk/2012/01/sylva-j15-is-kit-car-designed-by-jeremy.html

Monday 16 December 2013

Fuel System modifications

I have had to make a number of modifications to the original fuel system design as a result of experience when using the car. The first sign of trouble was on my return from the IVA, I decided to top up the tank in my garage and to my horror the tank was pressurised, the cap just about blew my head off.

The second problem is the fuel gauge, despite my efforts to make it accurate, was not. It was telling me it was empty and it had 1.5Gallons left. The standard VDO gauge is 380mm and the tanks as designed is 420mm. 40mm is roughly equivalent to the error of the gauge.

I had a read at the forums particularly on the matter of pressurisation and it turns out that HP fuel systems can cause this problem particularly when there is no room for expansion in the tank and where a simple one way valve is fitted. The fuel comes back from  the fuel rail slightly temperature elevated and therefore wants to expand the fuel in the tank. The one way valve compounds the problem as it is designed to let air in and not out. There is also a charging of the tank when you start the car up for the first time. Repeated start stop compounds the problem.

There is a valve called a Mocal valve that is designed to alleviate these problems as it works in both directions with limitations of course. This valve has a 0.5 bar negative inlet trigger point and a 0.75 bar positive pressure relief threshold. This is an expensive part ~£60 from various sources.

I fitted the Mocal valve and although this prevented the tank pressurising it dumped neat fuel occasionally under the car. My driveway has a 15deg slope and when driving up, the two way valve becomes temporarily blocked by fuel and then when the tank becomes pressurised it dumps neat fuel into the overflow till equilibrium is reached within the tank at 0.75 bar.

This in my opinion is an inherent problem with aero style tanks where the Mocal valve has to be connected at the same height a the top of the tank. It would be slightly easier if there was a filler neck, where no fuel was present and no fuel would be expelled.

The puma ECU has provision for a Carbon filter for such an eventuality along with a solenoid valve. When you are above a certain rev range it dumps the filtered fuel into the inlet manifold and weakens the mixture from the fuel rail. All by computer control.

I decided not to use that system as I had nowhere to put a carbon filter and I had no idea what would have happened with my variation in the design of the fuel system.

I pondered the issue for several weeks and came up with a three part solution.

* I install a fuel filler pot with a one way lead free valve from Car Builders Solution. The design of which forced a 45mm air gap at the top of the tank. No matter how hard you try it will not allow filling of the tank beyond a -45mm limit.
* Installed an overflow container with a glass bowl so I can keep an eye on any overflow events from the Mocal valve. It turns out it only overflows after driving up the driveway, after the tank has been filled and then only a very small quantity of fuel is discharged. The overflow reservoir can be emptied occasionally. Better than leaking fuel at the pits or the start line.
* Modified the VDO sender to read correctly by extending the range. I don't have any pictures of this modification, trust me it was difficult.

The overflow reservoir was made out of a large fuel filter from a large us car or lorry obtained from ebay.


Modified fuel system

Overfill protector
Mocal valve and overflow reservoir
Contents

http://sylvabuild.blogspot.co.uk/2012/01/sylva-j15-is-kit-car-designed-by-jeremy.html


Sunday 15 December 2013

Towing points

I have not taken the Sylva around a race track however I have taken it around the MSCC Forestburn hill climb track. One of the features missing is front and rear tow points. If nothing else it is fairly essential for getting the car on the trailer on your own.

The rear presented little challenge, I made a steel loop out of 4mm sheet with the plasma cutter. And cut a hole with a Rotabroach (Mag Drill / annular cutter) the appropriate size, enough to leave sufficient strength in the loop.

The front presented a bigger challenge. I needed something that attached to the chassis but avoided fouling the front bonnet/hood while accessing while opening and closing it (refuelling etc).

For the front I obtained a MSA compliant adjustable towing loop that extends beyond the GRP bonnet/hood and clips on to it with a press stud. The adjustable nature of the front tow loop locks in place once bolted to the attachment point.

The attachment points needed MIG welded to the chassis although I am sure a non welded solution is possible. Much time was spent restoring the chassis paint.

This is the second time I have had to attach something to the chassis post build.

4mm cut-outs from Plasma cutter

Front install
Rear Install

Contents


http://sylvabuild.blogspot.co.uk/2012/01/sylva-j15-is-kit-car-designed-by-jeremy.html

Friday 16 August 2013

ECU re-mapping

ECU re-mapping

The J15 I have just built uses a Puma 1.7 vvti engine designed by Yamaha. I stuck with the Ford ecu to keep costs down and hoped to inherit the reliability of the original ford package. I have however uprated the engine with cams, Racing Puma plenum, ported the head and fitted a lightened flywheel with a racing clutch.

A chap called Nik from Sitec did the mechanical work a year and a half ago. He still worked at Sitec when I took the engine back to have the ecu remapped. He handed the rolling road work to Ross and we started to make enquiries at a company called PumaSpeed about uprating the ecu to a racing puma spec. It turns out there is a limited amount you can do to the Ford ecu's as they only allow you into an ram update area but you can however change a number of key things to improve the torque at low revs which is the inherent problem with the standard package. We changed the timing, fuelling and disabled the torque limiter.

The problem with the DUDE ecu that came with the original donor car was that no one could uprate it to the desired Racing Puma spec. That is because it was an early ecu from 1997 and could not be uprated to a racing puma spec. It does not appear to have the update area.

My understanding is Ford only ever kept one ecu for the ford Puma range and when the electronics package was uprated the ecu was backwards compatible with older harnesses/engines. If you asked ford for a new ecu for an older engine Ford then re-flashed the ecu to match the engine spec.

I managed to obtain a newer ecu from a 2001 car which had an identical spec to my original donor car. It came complete with a lock barrel and key.

There is someone on ebay currently publishing a  cross reference from Coded ECU to Ford
part No:
97FB-12A850-HB (DUDE) My original Puma 1997
97FB-12A650-TA (PEST)

97BP-12A650-KA(????)

98FB-12A650-HC (MUFF)

XS6F-12A650-AHB (TAPE)

XS6F-12A650-APA (TEAT)

1S6F-12A650-HA (DIVE) The 2001  I obtained from ebay

It turns out that about the year 2000 they went from a single Oxygen sensor to  dual sensors (one before and after the cat). This was a mandatory EU change to put on a light if the cat efficiency dropped be low an acceptable level. Puma speed informed me despite that change it would work with my harness.

My original DUDE ecu from Puma R873 CGB extract from Ford ETIS
29.08.1997
Vehicle Line:   Puma 1997-2001
Body Style:   3 Door Coupe
Engine:   Zetec 1.7 EFI
Transmission:   5 Speed Manual Transaxle - B5/IB5
Drive:   RHD FWD
Axle Ratio:   3.82
Emission:   EEC 96 Car (EEC 1)
Air Conditioning:   Manual Air Conditioning
Territory:   (+)"GB"
Paint:   Panther Black (Metallic)
Interior Colour:   Alchemy Interior
Interior Fabric:   Silverstone/Echo


The markings on the side of the DIVE ECU from ebay:

Reg X774 OAC extract from Ford ETIS

10.01.2001
Vehicle Line:   Puma 1997-2001
Body Style:   3 Door Coupe
Version:   Series 10
Engine:   Zetec 1.7 EFI
Transmission:   5 Speed Manual Transaxle - B5/IB5
Drive:   RHD FWD
Axle Ratio:   3.82
Emission:   2000 EEC (EEC 7)
Air Conditioning:   Manual Air Conditioning
Territory:   (+)"GB"
Paint:   Panther Black (Metallic)
Interior Colour:   Medium Dark Graphite
Interior Fabric:   Chrome/Twill
The trick is when you obtain an ecu from ebay it is advisable to get a key and lock barrel to match. This is to get PATS system to recognise the new key while keeping the steering lock functional. Failure to do this takes you into uncharted territory as far as I can understand.

The resulting engine power was about +17bhp from the original ECU but although the torque at lower speeds was improved immensely the overall power was a bit disappointing at 112bhp. There is obviously something wrong I will publish the final torque curve when I figure out what is wrong.


Original plot with DIVE

Ross

Nick and Ross after tuning

Contents


http://sylvabuild.blogspot.co.uk/2012/01/sylva-j15-is-kit-car-designed-by-jeremy.html
Thursday 25 July 2013

Running lights

Running Lights

A high priority for me is to be seen particularly by SUV vehicles, they just don't look down low enough to see kit car drivers.

I found some Audi running lights they are 170mm x 16mm x 5mm thick. I bought these from ebay I could not find another product 5mm thick. The wiring was more or less in place as I provided for it in the loom.

They fit at the lowest point on the J15 and don't look out of place when off. When switched ON you would not ignore this car unless you are blind!

Off
Definitely ON!

References

Contents: http://sylvabuild.blogspot.co.uk/2012/01/sylva-j15-is-kit-car-designed-by-jeremy.html
ebay: Super Bright DRL Daytime Running LED's - MATRIX AUDI PORCH

Friday 12 July 2013

Road trials

Road trials

Took it out on the road today, taxed, insured, registered. Fitted the aero screen  for better comfort needs more wind deflection. Not fitted side screens as I don't know how to get in to it with them fitted.

Good points

* The road holding and ride quality are very good better than expected.
* The gearbox ratios although not perfect are better than the Westfield getting 40mph in 1st.

Bad points

* Far too much vibration at certain speeds +/- 2500rpm, esp in town in traffic and can be irritating to drive. Vibration maximum at 50Mph in 5th, 30Mph in 4th.
* Engine hunts when moving in traffic. Can promote a kangaroo like response unless you are quick with the clutch. All the web searches indicate a problem with the ICV or PAS over pressure switch.
*  Keep forgetting indicators need a sounder to remind me they are on.
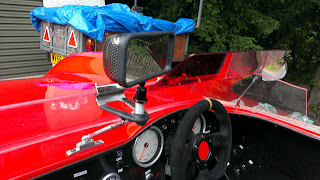
* When fitting the screen the rear view mirror needs relocated. Further brackets etc to be made.
* Needs running lights
* Sharp projections below the steering lock


Mods so far

*  Added cover to bottom of steering lock to remove sharp edges (that should have been a problem at IVA but was overlooked thank goodness).
* I have subsequently checked the PAS switch and indeed it was in the wrong state -  Obviously I have no PAS no kangaroo throttle when wire connected to correct ground.
* Modified the offside and nearside engine mounts and introduced a rubber sandwich. This has had a dramatic effect on the resonance at 2500rpm. It is not perfect but much improved.
* Modified location for rear view mirror
* Added a Cobra sun visor to act as a wind deflector.
* Mapin pizzo buzzer to indicators to stop me signalling permanently.


RVM changes

Engine mount sandwitch

Wind deflector


Proposed nearside sandwich mounts
 
Nearside sandwich

Revised engine steady
 

Contents: http://sylvabuild.blogspot.co.uk/2012/01/sylva-j15-is-kit-car-designed-by-jeremy.html

Wednesday 3 July 2013

Chasing Lambda failure

Chasing Lambda failure

The IVA failure of excessive lambda ratio of 1.06 vs 1.03 limit needed fixing. In addition to that the car is not performing that well being very hesitant between gears and the revs holding up too long. The IVA man wants less than 1.03. It took several trips to the local MoT station to try and get a hint of what was going on. At first I thought the exhaust manifold was pulling air due to a faulty gasket. The gasket was faulty but the high lambda remained stubbornly high despite my efforts changing the gasket.

The MoT tester John at Regent Motors suggested testing the inlet manifold, using a can of liquid butane and squirting it around the inlet manifold region. This is apparently used by some to find air leaks in the system. I took a can of camping gas, the gas that is used in one of those cheap stoves. I fitted a spray head from a WD 40 can. The spigots are a different size but a 4mm drill soon fixed that. The can of butane spray was then applied to the inlet side of the manifold, plenum and throttle body.

An area with a suspected crack was identified as a possible failure in the inlet manifold casting. I gave it a big squirt, this gave rise to a temporarily rich mixture that resulted in the engine running slower then speeding up again. I knew right away a new problem area had been located.

Getting the manifold out from the area behind the seat meant separating the manifold and plenum.  Five of the plenum button screws sheared the hex head detent. After drilling out the screws the broken flange was taken to Aliblast Services in Linlithgow for repair. He did an excellent job making a good penetration weld on each side. The next steps were to reassemble the manifold and plenum and return to the MoT station.

Crack viewed from below

Crack once dismantled

5 out of 10 screws drilled out on plenum

Welded flange 1

Welded flange 2

Return to the MoT station

Further tests revealed the emissions for Lambda had improved but only just enough but sitting on 1.03 limit. More work needed to be done to give a margin at the IVA station.

I decided to have a look around for further faults on the basis I don't think there is anything wrong with the various O2 sensors however I have fitted another new one in desperation. However, I found if I stuffed a wet towel up the exhaust I get fumes coming out of both the joints in the exhaust system. This can be a path for introducing Lambda type emission problems. I am not totally convinced as sealing the manifold made no difference. However plodding on, I made up copper gaskets for the two joints. I made them out of 1mm thick copper strip designed for moss prevention on roofs. I then packed the intermediate space with jointing compound. I then clamped it up tight with the existing clamps in both cases. A side effect is the exhaust no longer pops when the engine is revved up. The wet towel no longer  shows up any leaks.

Copper gasket

Diagnostic tools

I have been using some affordable diagnostic tools to help with this stage of the process:

1) An application on my Android phone called Torque and the associated Bluetooth code reader -  ELM 327. It can be used for plotting your progress around the track.

2) Sealey Lambda tester/stimulator VS925

Both these tools can reveal how the management system is dealing with the issue of it's closed loop performance. The first tool has an application called Fuel air status. It monitors if your system is achieving a closed loop control over emissions.

The second tool monitors the voltage on the Lambda sensor and tells you if the oxygen sensor is operating over the correct range.

I also tried a trick I found on YouTube for testing lambda sensors but in combination with the Sealey tool. If you connect up the Lambda sensors on the bench to the Sealey VS925 and heat the sensors with a  blow lamp (blue flame) you can monitor the display just like I did in the car. Initially the one that was unresponsive became responsive after a few minutes glowing red hot. In other words you can restore lambda sensors with a blow lamp if they become contaminated.


Hot news 3/7/13  @11:22

References:
1.01 Wow even at tick over!
 

In summary

* Leak in inlet and exhaust systems (4 places)
* New Lambda sensor
* Fuel tank vent valve
 

IVA retest

Passed! now for Build Up Inspection.


Sunday 16 June 2013

The dreaded IVA

The dreaded IVA


Well I met the IVA man (Alan), I have to say  he was very fair, the test took about two hours for my test the maximum is 6hrs. One of the first items was the Emissions and I failed at the first hurdle. The Lambda ratio was too high. If you want to understand more read: http://en.wikipedia.org/wiki/Oxygen_sensor

Basically I am producing more Oxygen versus un-burnt fuel thus potentially overheating the CAT. The system is closed loop so I have to investigate what the Oxygen sensor is reading versus what the ECU is doing in response. There is a product called a Lambda Tester that I need to investigate as it may give me a diagnostic tool in this case. The ideal Lambda ratio is 1:1 and the limit set is 1.03 and my car is producing 1.06. The reported most likely cause of such a problem is a minor leak in the exhaust system. I suspect the exhaust manifold gasket, proving it may be another matter.

Here are some pictures of the days events and the Lambda was the only fail:

Brake Test

Further discussion Lambda reading


Mirror and handling tests

References:

Wednesday 12 June 2013

MoT before IVA

MoT before IVA

I have the 14th June 2013 booked for the IVA inspection, in an attempt to check as much out as possible before the men from the ministry do their worst I decided to do an MoT first. Apparently you can do an MoT on an unregistered car provided it has a VIN number. Paul AS from the Locost forum gave me the lead on this. Potentially the following advantages are obtained taking it to a MoT station especially if the MoT man is as helpful as Colin at Regent Motors:

* Brake efficiency and handbrake balance
* Headlight alignment
* Emissions
* Wheel alignment (Not part of MoT)
* Safety check and comment on the build
* Lighting compliance check

In fact this was the second time at the MoT station the first time the following faults were found on a pre MoT inspection.

* Emissions were too high (Lambda %)
* Breaking efficiency poor
* Leaking offside rear calliper flexible hose
* Steering excessive play
* Advisory poor focus on headlamps due to fogging up of glass in the headlamps (it was a wet day).

I the interim I made an attempt to better seal the exhaust manifold, bedded in the brakes by use on private roads, replaced the rear flexible hoses, and replaced the UJ's on the steering.

The new MoT test revealed the fogging up problem still persisted but all the other issues were resolved. The emissions were apparently still too high. Colin was not taking into account the engine was from a donor vehicle 15 Years old in design terms. A pass certificate was issued after discussions with VOSA and a retest of the emissions. On return from the MoT the headlamp lenses were cleaned from the inside finally curing the fogging up issue and a spanner check was done on all the suspension bolts. Only two more days to go for the IVA inspection.

Colin at Regent Motors

References

Regent Motors MoT garage and helpful service.
Contents: http://sylvabuild.blogspot.co.uk/2012/01/sylva-j15-is-kit-car-designed-by-jeremy.html

Thursday 9 May 2013

Revisit the rear brake banjo clearance

Revisit the rear brake banjo clearance

I have been aware for some time that the clearance between the rear calliper banjo and the drive shaft boot was not enough. I was prepared to submit it for the IVA test with 2.5mm (NS) and 3.5mm (OS) basically because I had run out of ideas on how to fix it. While waiting for an IVA date nickm raised a thread about this issues and can be found at:

http://www.locostbuilders.co.uk/forum/26/viewthread.php?tid=181227

The rear calliper is a low cost light weight part from the VW Passat parts bin it has been remanufactured for Rally Design under the Hydra OEM handbrake calliper description. The issue is that to use this calliper you need the original low profile VW banjo. The banjo supplied by RD with the calliper is 12mm thick with a 12mm x 1mm  bolt and seals.

With much chewing of fat with the current  Locost J15 builders I found a manufacturer of a compatible banjo 9mm thick called HEL and a supplier called hosesolutions that will make any hose you like if you supply the specification (assuming they have the ends). In this case they have a low profile 12mm x 9mm banjo (probably from a motor bike).

My specification is as follows:

* Length including fittings 320mm
* 12mm x 9mm (thick) banjo
* 3/8" x 24 unf bulkhead male convex
* VW Passat rear calliper compatible banjo bolts and seals M12 x 1mm

The part was delivered in 24hrs and the quality is so good I want the others changed after IVA.

In summary I now have 7.5 -8.5 mm clearance between the drive shaft boot and the banjo bolt.


RD vs HEL part

HEL part with modified banjo bolt

References

Locost: http://www.locostbuilders.co.uk/forum/26/viewthread.php?tid=181227
HEL: www.hosesolutions.co.uk
Contents: http://sylvabuild.blogspot.co.uk/2012/01/sylva-j15-is-kit-car-designed-by-jeremy.html

Sunday 31 March 2013

Trim

Trim

Grill

Uneventful, decided to use 7mm high gloss alloy mesh from ebay. Applied a rubber edging trim to the rough grp bonnet edges and then hold the mesh on with small cable ties.

Seats

The driver seat was temporarily installed for some time now however with the looming IVA application I needed to do something about the seat belts apertures as they needed to come through the MK engineering seats at a different location. I am not going to bore you with detail but the apertures have now been moved. This was the last really difficult problem to solve in the build.

Wheel centres

The wheels are from a Ford Mondeo Verona and the wheel centres have an indent for an oval Ford badge which thanks to Keyfactors on line provided me with a SYLVA badge with the same dimensions. Keyfactors was chosen as they accepted my jpg artwork as I wanted to keep the lettering font consistent with the bonnet badge.

GRP central tub

This area has been a problem for some time as you have to cut the central tub to allow space for the roll bar. It is not easy to finish off so I cut some small grp filler panels and sealed it all with flame red Silicone. I also found some piping from a Dax Cobra supplier on ebay that supplied the trim for the outer perimeter sharp edge.

Cockpit panels

On all the alloy panels I used cbs 4.5 x 25mm piping, glued it to one half and then either riveted/rivnut the panel to the frame. It gives a pleasing finish to a difficult but necessary area of the build.

Harnesses

I purchased the harnesses from Prima Motor Sport, they are a very helpful company and market the FIA compliant harnesses under the Titon label. Unfortunately the J15 central tub is smaller than a 7 style car and this makes the belts smaller. I have the same seats in my Westfield and I did not come across this problem. I had 2-3" removed from the straps and I had to get anchor plates instead of compact hooks. The chap at Prima was really helpful and quick at making the changes. These harnesses are also IVA compliant and a good statement to this effect on their web page.

To-do

There is still a large snagging sheet, IVA application has gone in no date yet. I am doing a dummy run at the MoT station next week.

References

Keyfactors badges and emblems: www.keyfactors.co.uk
Prima Motorsport: http://www.primamotorsport.com/prima_motorsport_products/kit_car/kit_car_harness.html
Dax trim:
http://stores.ebay.co.uk/djsportscardax?_trksid=p2047675.l2563

Contents: http://sylvabuild.blogspot.co.uk/2012/01/sylva-j15-is-kit-car-designed-by-jeremy.html

Test run: http://youtu.be/ZkWvduzM8zE


Wheel centre trim


Grill


GRP seat fitting


Black piping


Centre tub trim panel


Tuesday 19 March 2013

Bonnet stays, fog and reverse lights

Bonnet stay, fog and reverse lights

Front bonnet stay

I purchased a CBS bonnet stay 300 - 530mm on the grounds that one of the build pictures featured on on the Sylva demo car had it fitted. After investigating this arrangement I decided that the suggested method of mounting (one of the build pics)  was far too complicated. Instead I opted to place the brackets adjacent to the petrol tank. It was surprisingly easy to mount it here for something I have been avoiding for months. I subsequently found a hazard in that a gust of wind can collapse the bonnet by triggering the latch on successive gusts. I have modified the stay to include a fail safe latch part to the latch.

Rear bonnet stay

I have used a horse box towing tether to stop the rear tub touching the ground. I have two lengths of stay a short and a long say. The short one needs no adjustment to the exhaust and allows access to check the oil and water. The longer stay needs the exhaust tail rotated but gives mush better access to the engine bay.

Fog and reverse lights

The mounting of the rear fog and reverse light mountings as the suggested location is remarkably close to my exhaust hot bits. I decided to make up some ss heat deflectors that hide some of the exhaust plumbing. I then attached the LED light units to the deflectors.

Exhaust

Decided to try out the exhaust for the first time fully welded up. Some shots of the car in my workshop. It was snowing outside:http://youtu.be/2A36uziawaM

 References

* CBS Bonnet & Boot Lid Stay Large Ref. Code: BNSTY 300mm- 530mm
* Contents list: http://sylvabuild.blogspot.co.uk/2012/01/sylva-j15-is-kit-car-designed-by-jeremy.html

Exhaust finally welded up

Bonnet stay anchor

Bonnet stay attachment

Bonnet stay retracted and unattached

Rear bonnet stay

Saturday 16 March 2013

Mirrors, exhaust and wheels

Mirrors, exhaust and wheels


Mirrors

The mirrors recommended by the manufacturer are from a Yamaha YZFR1 motor bike. The trouble is, the after market ones I bought off flea-bay, had no compliance markings and a troublesome 2 hole fixing. They did have a good antiknock feature. It was obvious to me this fixing method although adequate would take a minor miracle to get them drilled in the right position first time. The adjustment range was minimal once in place.  Most motorbike mirrors have a single M10 x 1.25mm fixing thread giving lots of angular adjustment that can be locked off with a special nut and plastic shroud for the IVA man.

PaulAS from the Locost forum started a thread which highlights all the problems with wing mirrors and the J15. All I can say is thanks,  without that thread I would have gone down the same rat hole as everyone else. Paul came up with some compliant mirrors with the correct markings that are also very cheap from the Furore parts supplier. The key issue is the correct position of the mirror although less critical than with the other mirrors it needs to be in line with the ridge in the GRP moulding and 160mm back from the bulkhead (exactly). If you don't put it there it restricts your ability to access it easily and will not give an ideal field of view in other positions.

I decided to cut away the GRP mirror mounting position with a 22mm hole saw. A bold step I realise but I wanted more resilience from the GRP panel. I turned a stepped and threaded aluminium section that filled the hole again and provided a reinforcement to the GRP panel where the mirrors are mounted (with the addition of PU adhesive of course). The purpose of this is to provide a location strong enough to survive a small knock. You will have to view all the pictures of all this before it all makes sense and I strongly advise looking at the PaulAS thread on the Locost forum. In future I may add a break-away spring for the odd knock from everyday use. I still like the Yahama mirrors but they would have to fit in with my reinforced GRP turning, perhaps they can be modified post IVA.

Exhaust

I decided to tack weld the tail section myself. I will decide at a later date if I am brave enough to weld it up (obviously to to the same standard as Graden of Stainless creations). The reason for the two stage approach is I could not work out earlier where I wanted the tail section to exit and I wanted to test fire the engine before fitting the GRP panels. The choice of a Westfield 5" can from my SEIW was in fact a good choice (and no longer temporary) as it has a built in CAT.

When I ran the engine for the first time with the boot/rear GRP moulding in place (I could only do this for the first time with the exhaust tail section tacked in place) I found the GRP moulding getting too hot, over 40degC and climbing. I managed to source an extra large  500mm x 500mm reflector and insulating panel for a Motorbike fairing supplier on eBay  which cured the problem.

Wheels

The wheel choice was made earlier but I have only just had them back from the refurbishers painted in mat black of course. They are off a Mondeo Verona and now they are on the car for the first time they look great (many thanks to Angus who found them on eBay). I was struggling with the wheels choice they now suit the car (no compromise) in my opinion. They could do with a little Sylva motif, later! The wheel are 6J x 15 x 40 the tyres are 185 x 55 x 15 Yokohama AD08's

Other activities

I have also been doing a lot of small and not so small tidying up jobs like the fuel system cover panel, tank one way up-side-down valve, steering wheel extension, sharp edge avoidance trim etc When the weather perks up a bit I plan to test the brakes, Video to follow!

References

Furore mirrors:http://furoreproducts.co.uk/85-e-marked-mirrors-iva-ok.html
Locost forum:http://www.locostbuilders.co.uk/forum/26/viewthread.php?tid=178579
Alloy Finihings:http://beta.glasgowwestendextra.co.uk/findit?action=showPlace&placeid=2234140
Road and Race:http://stores.ebay.co.uk/Road-and-Race-Online?_trksid=p2047675.l2563
Contents:http://sylvabuild.blogspot.co.uk/2012/01/sylva-j15-is-kit-car-designed-by-jeremy.html


I still have a way to go:-

* Weld exhaust up finaly
* Fit seat belts (find bolts first - scrap yard)
* Finish interior trim panels
* Fog and reverse lights
* Front grill
* Seat trim and mods for seat belts
* Brake test and balance bar lock off
* Bonnet stays
* Final wiring tidy
* Upper GRP tub edging trim
* Engine air filter
* Throttle cable fixings
* MoT verification test


Verona wheels

Mirror location 160mm from bulkhead + fixing unattached

Fixing attached

Shroud lowered

Haet shield on rear tub

Exhaust tacked up